CPAP machines deliver life-changing relief for sleep apnea sufferers, but they require consistent maintenance to work safely and effectively. Without regular cleaning, moisture buildup creates an ideal breeding ground for bacteria, mold, and mineral deposits, all of which can cause respiratory infections, equipment failure, and unpleasant odors. Think of CPAP maintenance like changing your HVAC filter or cleaning your dehumidifier: skip it, and the system that’s supposed to improve your air quality becomes a liability. This guide lays out a practical cleaning schedule that protects both your health and your investment.
Table of Contents
ToggleKey Takeaways
- A consistent CPAP cleaning schedule prevents bacterial growth, mold, and mineral buildup that can cause respiratory infections and equipment failure.
- Daily cleaning tasks—emptying the water chamber, wiping the mask, and airing tubing—take less than 5 minutes and eliminate 90% of contamination issues.
- Weekly deep cleaning of tubing and water chambers using mild soap and distilled water eliminates biofilm and mineral deposits that daily wipes cannot address.
- Replace disposable filters monthly (or every 15 days if you have pets) and use distilled water in the humidifier to prevent white mineral deposits and equipment damage.
- Common mistakes like using tap water, reassembling wet components, and aggressive cleaning damage your CPAP and compromise therapy effectiveness—use only mild soap, distilled water, and gentle handling.
Why Regular CPAP Cleaning Matters for Your Health
Every breath you take through a CPAP mask passes through tubing, a water chamber, and filter materials that collect moisture, skin oils, and airborne particles. When left uncleaned, these components become contaminated with biofilm, a slimy layer of bacteria that clings to wet surfaces.
Researchers have found that poorly maintained CPAP equipment can harbor Staphylococcus aureus, mold spores, and even Pseudomonas bacteria. These pathogens enter your airways each night, potentially triggering sinus infections, pneumonia, or chronic bronchitis. People with compromised immune systems face even greater risks.
Beyond infection, mineral deposits from tap water gradually clog the humidifier chamber and reduce airflow efficiency. This forces the motor to work harder, shortening the machine’s lifespan and degrading therapy pressure. Most manufacturers require proof of regular cleaning to honor warranty claims, neglect the maintenance schedule, and you may void coverage on a $500+ device.
Finally, there’s comfort. A dirty mask cushion develops an oily film that breaks the seal, causing air leaks and that annoying hissing sound at 2 a.m. Regular cleaning keeps the silicone supple and ensures consistent pressure throughout the night.
Daily CPAP Cleaning Tasks You Should Never Skip
Daily cleaning targets the components that touch your face and collect the most moisture. These tasks take less than five minutes but prevent 90% of contamination issues.
Each morning after use:
-
Empty the water chamber completely. Never leave standing water in the reservoir. Stagnant water grows bacteria within hours, especially in warm rooms.
-
Wipe down the mask cushion and frame. Use a damp cloth with mild, unscented dish soap. Focus on the silicone seal where skin oils accumulate. Rinse thoroughly and air-dry on a clean towel.
-
Hang the tubing to air out. Disconnect it from the machine and mask, then drape it over a towel bar or shower rod. Gravity helps residual moisture drain out, reducing mold risk.
-
Wipe the exterior of the machine. Dust and pet dander settle on vents and can get pulled into the airflow. A microfiber cloth works well here.
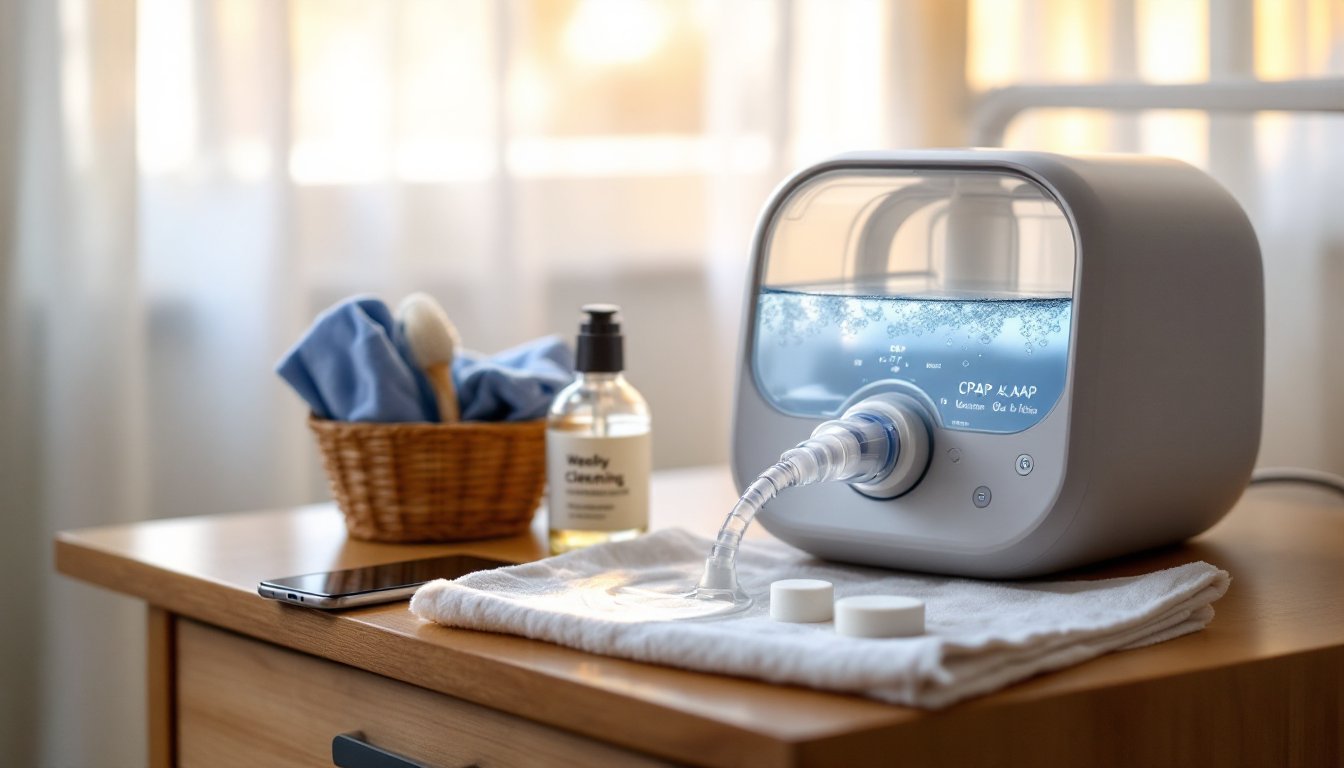
Keep a dedicated cleaning station near your CPAP setup, a small basket with mild soap, a clean towel, and a drying rack. Making these supplies visible helps build the habit. Safety note: Always unplug the machine before handling any components near water, even during cleaning.
Weekly Deep Cleaning: Tubing and Water Chamber Maintenance
Weekly cleaning tackles biofilm and mineral buildup that daily wipes can’t address. Set a recurring reminder for the same day each week, Sunday mornings work well for most users.
Weekly deep clean procedure:
-
Disassemble all washable components. Remove the mask, tubing, water chamber, and any filters labeled as reusable. Check your user manual: some headgear straps are machine-washable.
-
Soak the water chamber in warm soapy water for 15–20 minutes. Use a mild dish soap (unscented, no moisturizers). For stubborn mineral deposits, fill the chamber with a 1:1 solution of distilled white vinegar and water, let it sit for 20 minutes, then scrub gently with a soft bottle brush. Rinse thoroughly, any soap or vinegar residue will irritate your airways.
-
Clean the tubing inside and out. Fill a sink or basin with warm soapy water. Submerge the tubing and swish it around to flush the interior. Some users run soapy water through with a funnel, then rinse by running clean water through the same way. Hang the tubing vertically to dry completely, damp tubing invites mold.
-
Inspect the mask for wear. Check the silicone cushion for cracks, tears, or permanent deformation. Even small damage breaks the seal. Most cushions last 1–3 months depending on usage and skin chemistry.
-
Rinse everything with distilled water as a final step. Tap water leaves mineral spots that harden over time. Distilled water (available at any grocery store for under $1/gallon) prevents this.
Allow all components to air-dry completely before reassembling. Never use a hairdryer or place parts in direct sunlight, heat degrades silicone and plastics. Many reviews of modern CPAP machines now highlight models with dishwasher-safe water chambers, which simplifies weekly cleaning.
Monthly CPAP Maintenance and Filter Replacement
Monthly maintenance focuses on filters, deep inspections, and component replacement. Most CPAP machines use two filter types: a reusable foam filter and a disposable fine-particle filter.
Monthly checklist:
• Replace disposable filters. These thin white filters (often called ultrafine or hypoallergenic filters) cannot be washed. Swap them out every 30 days, or every 15 days if you have pets, live in a dusty area, or run the machine in a workshop.
• Wash reusable foam filters. Rinse under cool running water until the water runs clear. Gently squeeze out excess water, don’t wring or twist, which tears the foam. Air-dry flat on a towel for at least 24 hours. Keep a spare on hand so you can swap them during drying.
• Inspect tubing and seals for cracks. Hold the tubing up to a light source and look for small splits or cloudiness. Replace tubing every 3–6 months as a preventive measure. Standard tubing costs $10–$20 and is available from most medical supply stores.
• Check the power cord and connections. Look for fraying, exposed wires, or loose plugs. Damaged cords are a fire hazard and should be replaced immediately.
• Deep-clean the humidifier chamber with a vinegar soak. Even with weekly cleaning, mineral scale accumulates. A monthly vinegar soak (1:1 ratio, 30 minutes) dissolves stubborn deposits.
Some manufacturers recommend replacing the water chamber annually, especially if you use tap water regularly. Product care guidelines often specify replacement intervals for each component, check your user manual or the manufacturer’s website.
Safety warning: Never operate the machine with missing or damaged filters. Unfiltered air carries dust and allergens directly into your lungs.
Best Cleaning Supplies and DIY Solutions for Your CPAP
You don’t need specialty products for effective CPAP cleaning, common household supplies work just as well and cost far less.
Recommended cleaning supplies:
• Mild dish soap (unscented, no moisturizers). Dawn Free & Clear or Seventh Generation Free & Clear are good options. Avoid antibacterial soaps, which leave residues that irritate airways.
• Distilled white vinegar. A natural disinfectant that dissolves mineral deposits without harsh chemicals. Always dilute 1:1 with water.
• Distilled water. For rinsing and humidifier use. Prevents mineral buildup and white dust.
• Soft bottle brush or pipe cleaner. For scrubbing the water chamber interior without scratching.
• Microfiber cloths. Lint-free and gentle on plastics and silicone.
DIY cleaning solution: Mix 1 part distilled white vinegar with 3 parts distilled water. This works as a weekly soak for tubing and water chambers. Rinse thoroughly afterward.
What to avoid:
• Harsh chemicals. Bleach, ammonia, alcohol-based cleaners, and scented soaps damage silicone and plastics. They also leave fumes that you’ll inhale during therapy.
• CPAP cleaning machines (ozone or UV). The FDA has issued warnings about automated CPAP cleaners that use ozone gas or activated oxygen. These devices can degrade equipment materials and may expose users to harmful ozone levels. They’re also not proven more effective than soap and water.
• Dishwasher detergent (for most components). Unless the manufacturer explicitly states a part is dishwasher-safe, avoid it. High heat and harsh detergents warp plastics.
Some users maintain the same connected device care routines they use for home electronics, gentle cleaning, proper storage, and regular inspections. It’s a smart approach that extends the life of any equipment.
Common CPAP Cleaning Mistakes to Avoid
Even diligent users make cleaning errors that compromise therapy or damage equipment. Here’s what to watch for.
Mistake #1: Using tap water in the humidifier. Tap water contains minerals (calcium, magnesium) that leave crusty white deposits and create airborne particulates. Always use distilled water. It costs about $1 per gallon and eliminates this issue entirely.
Mistake #2: Reassembling components before they’re fully dry. Trapping moisture inside the tubing or mask creates a perfect environment for mold. If you’re in a hurry, use a second set of tubing and masks so you always have a dry backup.
Mistake #3: Cleaning too aggressively. Scrubbing silicone cushions with abrasive sponges or brushes causes micro-tears that harbor bacteria and break the seal. Use only soft cloths and gentle pressure.
Mistake #4: Ignoring the filter. A clogged filter forces the motor to work harder, increasing noise and reducing pressure accuracy. Some users don’t realize their machine has a filter, check the side or back panel.
Mistake #5: Storing the machine in a damp bathroom or basement. High humidity accelerates mold growth. Store your CPAP in a dry, well-ventilated area, preferably on a nightstand with good airflow.
Mistake #6: Skipping the user manual. Each CPAP model has specific cleaning recommendations and component lifespans. Some heated tubing, for instance, should never be submerged in water. Download a PDF copy of your manual and keep it accessible, most manufacturers post them online.
Mistake #7: Delaying mask cushion replacement. Oils from your skin break down silicone over time. A worn cushion leaks air and reduces therapy effectiveness, even if it looks fine. Replace cushions every 1–3 months or sooner if you notice leaks.
Conclusion
A consistent CPAP cleaning schedule isn’t just about equipment longevity, it’s essential preventive health care. Daily wipe-downs, weekly deep cleans, and monthly filter changes take less than 30 minutes per week total, but they prevent infections, extend your machine’s life, and ensure you’re getting the full therapeutic benefit every night. Treat your CPAP like any critical home system: routine maintenance now saves expensive repairs and health complications later.


