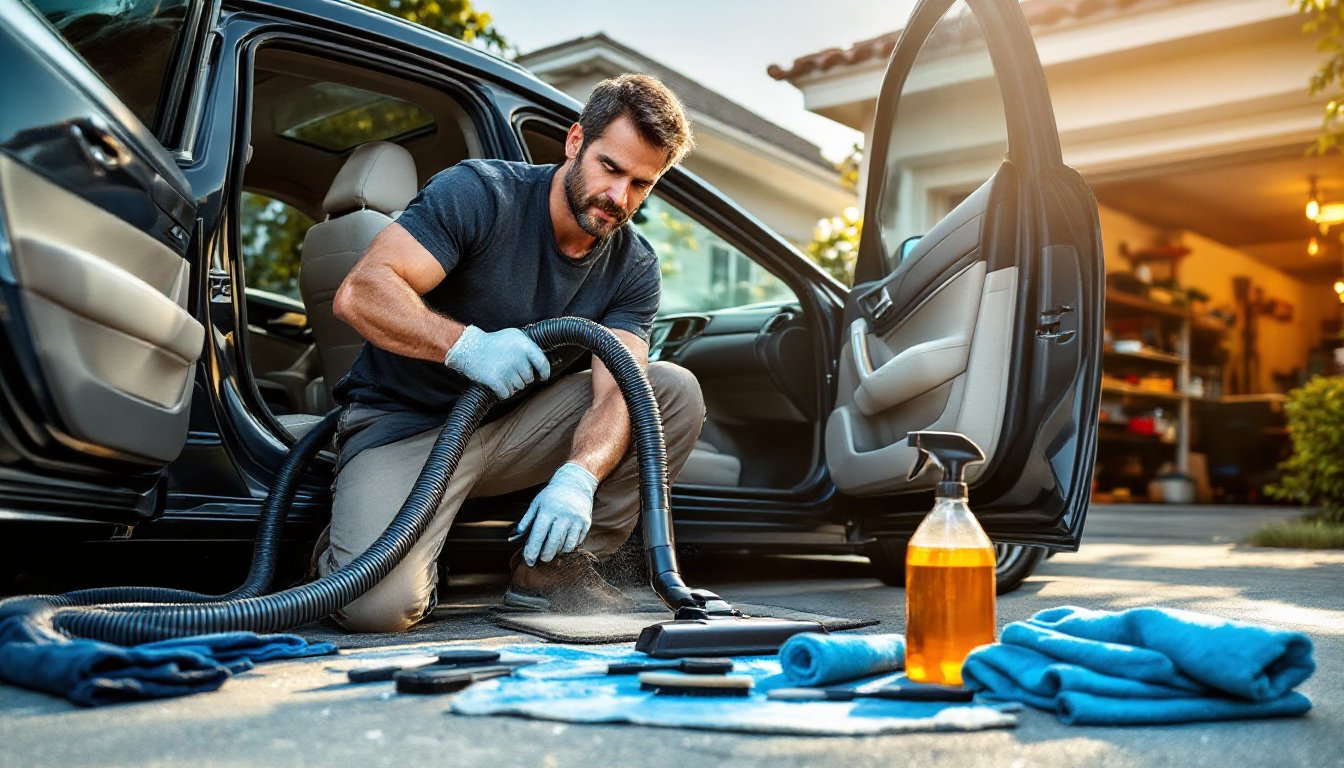
A car’s interior takes a beating, spilled coffee, tracked-in mud, pet hair, and the daily grind of commuting all conspire to turn a once-pristine cabin into a rolling disaster zone. While a quick vacuum at the gas station might knock back surface debris, it won’t touch the grime embedded in seats, the dust caked into air vents, or the mystery stickiness on the center console. A true deep clean restores not just appearance but also longevity: dirt acts like sandpaper on upholstery, and grime clogs climate systems. This guide walks through the tools, techniques, and elbow grease needed to bring a car interior back to showroom condition without paying detailer rates.
Table of Contents
ToggleKey Takeaways
- Deep car cleaning restores interior longevity and resale value by removing dirt that acts like sandpaper on upholstery and clogs climate systems.
- Essential tools for professional-level deep car cleaning include a shop vacuum with multiple attachments, microfiber towels, automotive-grade cleaning solutions, and compressed air for hard-to-reach areas.
- Start deep cleaning from top to bottom—headliner, seats, carpets—using gentle pressure on delicate surfaces and firm agitation on heavily soiled areas to avoid damage.
- Fabric seats require spot-testing, light moisture application, and proper extraction to prevent mildew, while leather needs cleaner applied to towels (never directly on seats) followed by sparing conditioner application.
- Schedule deep cleans twice yearly to prevent grime from embedding, reduce allergens and bacteria, and maintain both vehicle health and occupant well-being.
- Plan 4–6 hours including drying time for a complete interior deep clean, and prioritize working in ventilated spaces with proper safety gear like gloves and dust masks.
Why Deep Cleaning Your Car Matters More Than You Think
Most people treat car interiors like they’re indestructible, but neglect costs real money. Dirt particles grind into fabric and leather every time someone sits down, accelerating wear and fading. Dashboard plastics crack faster when coated in UV-attracting dust and grime. Air vents clogged with debris reduce HVAC efficiency and can harbor mold spores, especially problematic in humid climates.
Resale value takes a direct hit from a trashed interior. Dealerships and private buyers alike judge condition harshly, and no amount of exterior detailing compensates for stained seats or a reeking cabin. A well-maintained interior can add hundreds to a trade-in offer.
There’s also the health angle. Allergens, bacteria, and mold thrive in the crevices of car interiors. If anyone in the household has allergies or asthma, a deep clean isn’t optional, it’s maintenance. Regular deep cleaning (twice a year minimum, quarterly if the car sees heavy use) protects both the investment and the occupants.
Essential Supplies and Tools for a Professional-Level Clean
Attempting a deep clean without the right gear wastes time and risks damage. Here’s what belongs in the kit:
Vacuums and Attachments:
- Shop vacuum (4+ gallons) with a crevice tool, brush attachment, and upholstery nozzle. Household vacuums lack the suction and capacity for automotive grit. A wet/dry vac handles spills and shampoo extraction.
- Extension hose (6+ feet) to reach rear footwells without gymnastics.
Brushes and Agitators:
- Detailing brushes in three sizes: soft-bristle for vents and trim, medium for upholstery seams, stiff for floor mats and carpets.
- Old toothbrushes work for tight spots around seat adjusters and door pockets.
Cleaning Solutions:
- All-purpose cleaner (pH-neutral, automotive-grade). Household cleaners can leave residue or damage finishes.
- Upholstery shampoo or extractor solution for fabric seats.
- Leather cleaner and conditioner (two separate products, never combine steps). Skip the conditioner on perforated leather: it clogs holes.
- Glass cleaner (ammonia-free to protect tinted windows).
- Protectant spray for dashboards and trim (matte finish preferred: high-gloss creates blinding reflections).
Microfiber Arsenal:
- At least a dozen microfiber towels: some for cleaning, others for buffing. Color-code them (blue for glass, gray for interiors, etc.) to avoid cross-contamination.
- Waffle-weave towels absorb better for shampoo extraction.
Miscellaneous:
- Compressed air (canned or small compressor) to blow debris from vents and seams.
- Plastic trim tools to pop out floor mats or access hidden fasteners without scratching.
- Bucket and spray bottles for diluting solutions.
Safety Gear:
- Nitrile gloves to protect hands from cleaners and mystery gunk.
- Dust mask (N95 if dealing with mold or heavy dust).
- Work in a ventilated area, garages with open doors, driveways, or carports. Never deep-clean in an enclosed space with the engine running.
Optional but Useful:
- Steam cleaner (handheld or canister) for sanitizing without chemicals. Effective on cloth seats and hard surfaces.
- Wet/dry vacuum with upholstery attachment speeds up shampoo extraction.
Skip the gimmicks: “detailing clay” for interiors, overly fragrant sprays, and “all-in-one” products that try to clean and protect simultaneously. They underperform and often leave residue.
Step-by-Step: Deep Cleaning Your Car Interior
Vacuuming and Removing Debris
Start with the boring but critical prep work. Remove floor mats, car seats (if possible, most just slide forward and have quick-release bolts), and anything stored in door pockets or the center console. Shake out mats outside: if they’re rubber, hose them down and let them dry completely before reinstalling.
Vacuum top to bottom. Begin with the headliner (fabric ceiling) using the brush attachment, gentle pressure only: headliner adhesive weakens over time, and aggressive scrubbing can cause sagging. Work down to seats, then carpets. Use the crevice tool for seat tracks, under seats, and around pedals. Compressed air blasts out debris from air vents, cup holders, and seams: follow immediately with the vacuum to catch fallout.
Pay special attention to seat seams and the gap between seat cushions and backrests, this is where crumbs, coins, and pet hair accumulate. For embedded pet hair, wrap a section of duct tape (sticky side out) around your hand or use a rubber squeegee in short, brisk strokes.
Don’t skip the trunk or cargo area. Pull up trunk liners if removable: vacuum underneath and check for water intrusion or rust (a sign of bigger problems requiring professional assessment).
Cleaning and Conditioning Seats and Upholstery
Fabric Seats:
Spot-test any cleaner on an inconspicuous area (under the seat, bottom cushion edge) before going all-in. Spray upholstery shampoo directly onto stains, let it dwell per product instructions (usually 3-5 minutes), then agitate with a detailing brush in circular motions. Extract moisture with a shop vac or clean microfiber towels, press firmly and blot: don’t rub, which spreads the stain.
For a full shampoo, work in 2×2-foot sections. Apply cleaner, scrub, extract, repeat. Over-wetting is the enemy: it leads to mildew and long dry times. If using a wet/dry vac, make multiple slow passes to pull out as much water as possible. Leave windows cracked and park in sunlight (or use fans) to speed drying, aim for 4-6 hours minimum before driving.
Leather Seats:
Leather requires a gentler touch. Spray leather cleaner onto a microfiber towel (never directly on the seat, it can seep into seams and stitching, causing stiffness or discoloration). Wipe in straight lines, not circles, to avoid streaking. Work one panel at a time: seat bottom, backrest, headrest.
After cleaning, let the leather dry for 15 minutes. Apply leather conditioner sparingly with a foam applicator or clean towel. Buff off excess after 10 minutes. Over-conditioning leaves a greasy film that attracts dirt. For perforated leather (common in heated/cooled seats), wipe excess conditioner immediately to prevent clogging.
Cracked or heavily worn leather may need a dedicated repair kit or professional recoloring, that’s beyond DIY scope.
Vinyl and Cloth Headliners:
Headliners stain easily (sunroof leaks, handprints) but clean cautiously. Use minimal moisture. Spray all-purpose cleaner onto a microfiber towel, blot stains gently, then wipe with a damp (not wet) towel. Excessive water loosens adhesive, leading to sagging that costs $200–$400 to repair.
Detailing Dashboard, Console, and Hard Surfaces
Start dry. Use a microfiber towel or duster to remove loose dust from the dash, console, steering wheel, and door panels. For vents, home organization tips often suggest foam brushes, but a soft-bristle detailing brush works better, spray it lightly with all-purpose cleaner, brush out each vent slat, then follow with compressed air.
Spray cleaner onto a microfiber towel and wipe all hard surfaces: dashboard, steering wheel (especially the backside, everyone forgets it), center console, door armrests, and window switches. Clean the gear shifter and parking brake handle: these are high-touch, high-grime areas.
For stubborn grime around buttons or touchscreen edges, use a toothbrush dipped in cleaner. Avoid soaking electronics, moisture kills touchscreens and climate controls.
Screens (infotainment, gauge clusters) require special care. Use a microfiber cloth slightly dampened with distilled water or screen-safe cleaner. Many product reviews highlight that all-purpose cleaners can damage anti-glare coatings.
Windows:
Clean windows last to avoid re-contamination from overspray. Spray ammonia-free glass cleaner onto a microfiber towel, wipe in straight lines (horizontal on the outside, vertical on the inside to identify streaks). Lower windows slightly to clean the top edge, this strip collects grime and causes streaks when the window raises.
For rear windows with defrost lines, wipe parallel to the lines to avoid damage.
Protectant Application:
Once surfaces are clean and dry, apply protectant to plastic and vinyl trim (dash, door panels, console). Spray onto a foam applicator or microfiber towel, not directly onto the surface, overspray on glass or pedals creates safety hazards. Buff to an even, matte finish. Skip the steering wheel: protectant makes it slippery.
Floor Mats and Carpets:
Carpet floor mats clean like upholstery: shampoo, scrub, extract, dry. Rubber mats need only soap, water, and a stiff brush. Let everything dry completely, wet mats trap moisture and breed mold.
For permanent carpet, spot-clean stains with upholstery shampoo. Steam cleaners excel here, killing bacteria without soaking fibers. If carpets are beyond saving, aftermarket replacements run $30–$100 depending on the vehicle.
Conclusion
A thorough deep clean isn’t a weekend project, it’s preventive maintenance that protects resale value, extends material life, and makes every drive more pleasant. The process demands patience and the right supplies, but the payoff is a cabin that feels new again. Schedule deep cleans twice yearly, and the work gets easier each time as grime has less chance to embed. For those tackling it for the first time, expect 4-6 hours from start to finish, including drying.