A dishwasher might clean dishes, but it doesn’t clean itself, not really. Over time, food debris, grease, mineral deposits, and detergent residue build up in hidden corners, filters, and spray arms. That buildup doesn’t just smell bad: it reduces cleaning power, clogs components, and can shorten the lifespan of the appliance. Left unchecked, owners may find themselves rewashing dishes by hand or calling for expensive repairs. Regular maintenance takes less than 30 minutes and uses household supplies most people already have. This guide walks through why cleaning matters, how to spot warning signs, and a straightforward process to restore a dishwasher to peak performance.
Table of Contents
ToggleKey Takeaways
- Cleaning the dishwasher regularly prevents performance degradation, reduces odor, and avoids expensive repairs costing $150–$400 by keeping filters, spray arms, and drains clear of debris buildup.
- Warning signs your dishwasher needs cleaning include dirty dishes, foul odors, white mineral deposits, unusual noises, and water pooling at the bottom—all indicators of clogged filters or hard water accumulation.
- A complete cleaning takes about 30 minutes using household supplies: remove and scrub the filter, wipe interior seals and walls, then run separate vinegar and baking soda cycles to dissolve grease and eliminate odors.
- Monthly filter inspections and quarterly deep cleaning cycles are recommended for most households, with hard water areas requiring more frequent maintenance and the addition of rinse aid to reduce spotting.
- A properly maintained dishwasher lasts 10–15 years, while skipping maintenance can cut the lifespan in half, making preventive care the most cost-effective approach to appliance longevity.
Why Regular Dishwasher Cleaning Matters
Dishwashers work hard. Every load introduces food particles, fats, soap scum, and minerals from hard water. Even with pre-rinsing (which isn’t always necessary with modern machines), debris makes its way into the filter, drain, and spray arm jets. When those passages clog, water can’t circulate properly. The result: dishes come out spotted, greasy, or still dirty.
Performance degradation is the first casualty. A clogged filter forces the pump to work harder, increasing energy use and wear on internal components. Spray arms with blocked jets can’t deliver the high-pressure water needed to scour plates and glassware. Over time, this can lead to pump failure or motor burnout, repairs that often cost $150 to $400, depending on the model and local labor rates.
Odor is another issue. Trapped food particles decompose in the warm, moist environment, creating a swampy smell that transfers to supposedly clean dishes. Mold and mildew can colonize door seals and hidden crevices, especially in homes with high humidity or infrequent dishwasher use.
Hard water deposits (calcium and magnesium) coat heating elements and interior surfaces, reducing efficiency and leaving a white film on glassware. In severe cases, mineral buildup can interfere with detergent performance and even damage sensors or valves.
Routine cleaning addresses all of this before it becomes a repair bill. It’s preventive maintenance, not unlike changing the oil in a car or cleaning the lint trap in a dryer.
Signs Your Dishwasher Needs a Deep Clean
Most homeowners don’t think about dishwasher maintenance until something’s obviously wrong. Here are the red flags:
- Visible food debris in the bottom of the tub or around the door seal. If there’s a puddle of murky water after a cycle, the drain or filter is likely clogged.
- Foul odor when opening the door, even right after a cycle. This is decomposing food or mildew.
- Dishes coming out dirty or with a greasy film. Residue on glassware, especially a cloudy or spotted appearance, points to hard water buildup or detergent that isn’t dissolving properly.
- Unusual noises during operation, grinding, buzzing, or rattling, can indicate debris in the pump or spray arm.
- White or chalky residue on the interior walls, heating element, or dishes. That’s mineral scale from hard water.
- Water pooling at the bottom of the tub after the cycle ends. A blocked filter or drain hose is the usual culprit.
Any one of these signals it’s time to act. Waiting only makes the problem worse and increases the chance of permanent damage. According to home cleaning experts at The Spruce, regular maintenance is the single best way to extend appliance life and avoid costly service calls.
Step-by-Step Guide to Cleaning Your Dishwasher
This process takes about 30 minutes and requires minimal supplies. Tackle it when the dishwasher is empty and cool.
Materials and tools:
- White vinegar (distilled, not cleaning vinegar, acidity is around 5%)
- Baking soda
- Soft-bristle brush or old toothbrush
- Microfiber cloth or sponge
- Dish soap
- Toothpick or wire (for unclogging spray arm holes)
Safety note: Always wear nitrile or rubber gloves when handling filters and debris. Some buildup can harbor bacteria.
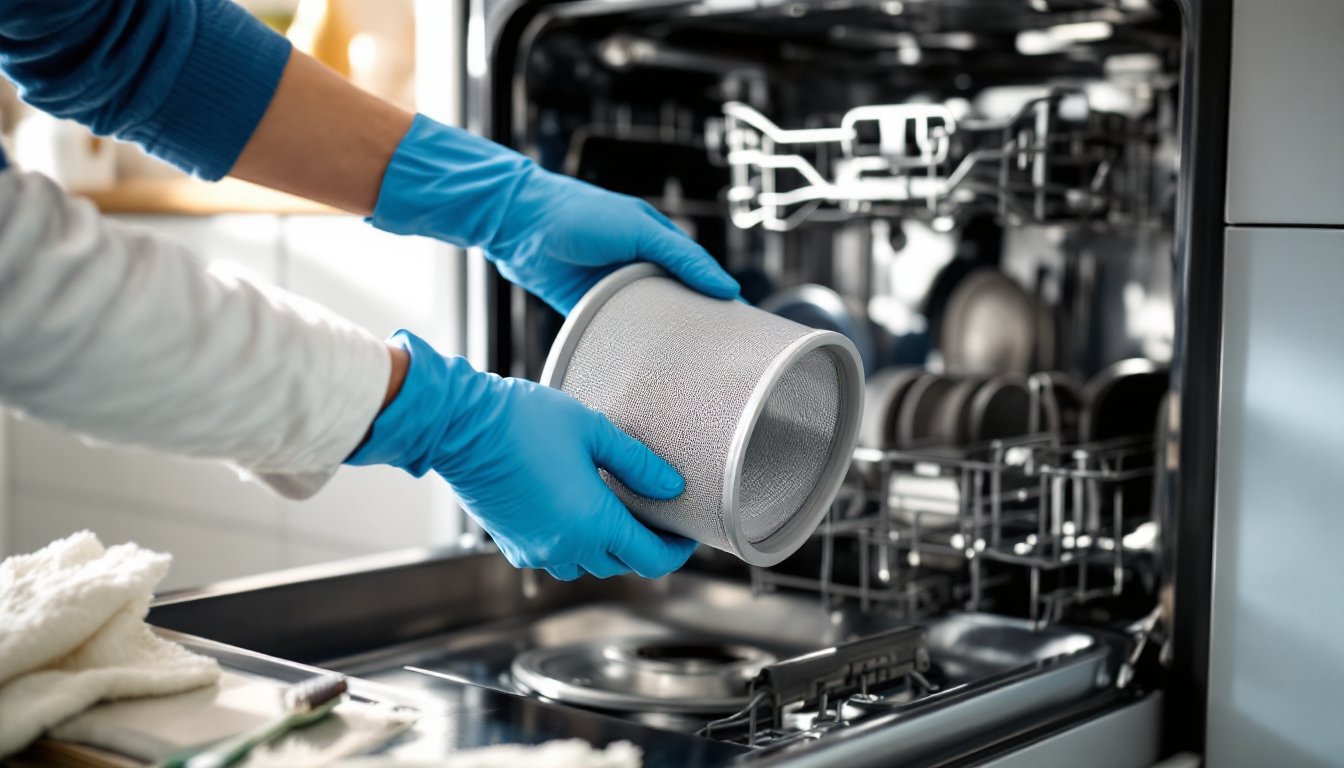
Clean the Filter and Drain
The filter is the first line of defense against food particles. On most models, it’s located in the bottom center of the tub. Consult the owner’s manual if it’s not immediately visible, some brands hide it under a twist-lock cover.
- Remove the filter. Twist counterclockwise (usually) and lift out. Some models have a two-part filter: a coarse screen and a fine mesh cylinder. Remove both.
- Rinse under hot water. Use a soft-bristle brush and a drop of dish soap to scrub away grease and debris. Pay attention to the mesh: clogs here are common. If buildup is stubborn, soak the filter in hot, soapy water for 10–15 minutes.
- Check the drain area. With the filter removed, inspect the sump (the hole where the filter sits). Remove any visible debris, seeds, broken glass, twist ties, and small bones are frequent offenders. Wipe the area with a damp cloth.
- Inspect and clean the spray arms. Pull out the lower and upper spray arms (they usually twist or snap off). Hold them up to the light and look through the holes. Use a toothpick or fine wire to clear any clogs. Rinse thoroughly and reinstall.
Pro tip: If the spray arms don’t spin freely once reinstalled, there’s likely still an obstruction or a worn bearing. That’s a parts-order situation, not a cleaning fix.
Wipe Down the Interior and Door Seals
The interior walls, door, and rubber gasket around the door collect grease, soap scum, and mildew.
- Mix a cleaning solution. A 50/50 mix of white vinegar and water in a spray bottle works well. For stuck-on grime, use dish soap and water.
- Spray and wipe the interior walls, door, and bottom of the tub. Pay special attention to the corners and the area around the detergent dispenser. Mineral deposits often accumulate here.
- Clean the door seal. The rubber gasket traps food particles and moisture. Use the soft-bristle brush or an old toothbrush dipped in soapy water to scrub the folds. Wipe dry with a microfiber cloth. If mildew is present, a paste of baking soda and water (three parts baking soda to one part water) works as a mild abrasive and deodorizer.
- Don’t forget the door edges and control panel. Wipe the exterior door, handle, and buttons with a damp cloth. Stainless steel finishes can be polished with a dedicated cleaner to avoid streaking.
Run a Vinegar and Baking Soda Cycle
This two-step process tackles residue, odors, and mineral buildup inside the machine.
- Vinegar cycle. Place a dishwasher-safe bowl or measuring cup filled with 2 cups of white vinegar on the top rack. (Do not pour vinegar into the detergent dispenser, it can damage rubber seals over time.) Run a full hot-water cycle with no other dishes or detergent. The vinegar will dissolve grease, soap scum, and light mineral deposits. It also deodorizes.
- Baking soda cycle. After the vinegar cycle completes, sprinkle 1 cup of baking soda across the bottom of the tub. Run a short hot-water cycle (or just the rinse cycle if the machine has that option). Baking soda neutralizes odors and provides a gentle scrub to the interior surfaces.
Why not use both at once? Vinegar (an acid) and baking soda (a base) neutralize each other when mixed, rendering both less effective. Sequential cycles preserve their individual cleaning power.
Alternative cleaners: Commercial dishwasher cleaners (tablets or liquid) can be used in place of vinegar. Brands like Affresh or Finish offer formulas designed to target limescale and grease. Follow the package directions. These products are convenient but not strictly necessary, vinegar and baking soda handle most jobs for pennies.
Caution: Avoid using bleach in dishwashers with stainless steel interiors. It can cause discoloration and corrosion. For machines with plastic tubs and persistent mold, a diluted bleach solution (1 cup bleach in a full hot cycle, no dishes) can be used occasionally, but rinse thoroughly afterward.
How Often Should You Clean Your Dishwasher?
Maintenance frequency depends on use, water hardness, and what’s being washed.
Monthly tasks:
- Inspect and rinse the filter. If dishes are heavily soiled or the household runs the dishwasher daily, check the filter every two weeks. Homes with hard water or frequent use of the garbage disposal (which can send debris back into the dishwasher drain line) should inspect weekly.
- Wipe down door seals and interior surfaces. A quick pass with a damp cloth prevents buildup.
Quarterly tasks:
- Deep clean with vinegar and baking soda cycles. Four times a year is sufficient for most households. Those dealing with hard water or noticing spots on dishes may need to do this monthly.
- Check spray arm holes for clogs. Mineral deposits can accumulate slowly: a quarterly inspection keeps water flowing freely.
Annual tasks:
- Inspect the drain hose and air gap (if installed). Disconnect the hose (usually at the sink or garbage disposal) and look for kinks, clogs, or buildup. An air gap, a small chrome or plastic cylinder on the countertop near the sink, prevents backflow. Remove the cap and clear any debris inside.
- Run a heavy-duty cleaner or descaling cycle. If the area has extremely hard water, a commercial descaler (often citric acid–based) once a year can prevent long-term mineral damage.
Hard water considerations: Homes with water hardness above 7 grains per gallon (ask the local water utility or test with a kit from a hardware store) should add a rinse aid to every load and clean the dishwasher more frequently. Rinse aid helps water sheet off dishes and reduces spotting. It also helps prevent mineral films on interior surfaces.
Pro tip: If the household has a water softener, use less detergent. Soft water requires less soap to achieve the same cleaning power: excess detergent leaves a residue that’s just as bad as hard water scale. Manufacturers of high-efficiency dishwashers often recommend using about two-thirds the amount of detergent in soft water.
A well-maintained dishwasher can last 10 to 15 years. Skipping maintenance can cut that lifespan in half. The investment in time and cheap household supplies pays off in fewer repairs, better cleaning performance, and dishes that actually look clean. Many of the same principles apply to other home cleaning routines, consistent effort beats emergency deep cleans every time.


