When rainwater flows off the roof into gutters but has nowhere to go, it doesn’t just vanish, it pools around the foundation, floods the basement, or turns the yard into a swamp. That’s where underground gutter drains come in. These buried pipes carry water away from the house to a safe discharge point, but only when they’re clear. Over time, leaves, silt, root intrusions, and debris turn free-flowing pipes into clogged tunnels. Cleaning underground drains isn’t glamorous work, but it’s essential maintenance that protects the home’s foundation and prevents costly water damage.
Table of Contents
ToggleKey Takeaways
- Underground gutter drains require regular cleaning to prevent foundation damage and basement flooding, as leaves, silt, and root intrusions accumulate over time.
- Common warning signs of clogged underground drains include water overflowing from downspouts, pooling around drain bases, and basement seepage—addressing these early prevents costly repairs.
- Effective cleaning underground gutter drains involves locating access points, flushing with high-pressure water, snaking stubborn blockages, and reverse-flushing from the outlet.
- Prevention is more cost-effective than remediation: install downspout filters, flush the system twice yearly, trim nearby trees, and ensure proper pipe slope to maintain drainage efficiency.
- Upgrading from corrugated pipe to solid schedule 40 PVC reduces future clogs, and adding cleanout access points makes ongoing maintenance significantly easier.
Why Underground Gutter Drains Get Clogged
Underground drains trap debris that slips past gutter guards or builds up in downspouts. Even homes with well-maintained gutters deal with this, organic matter breaks down into sludge, and heavy rain pushes it deeper into the system.
Leaves and organic debris are the primary culprits. Decomposing leaf litter turns into a dense paste that sticks to pipe walls, especially in 3-inch or 4-inch corrugated drain pipe (the most common types in residential systems). Smooth-walled PVC resists buildup better but isn’t immune.
Sediment and silt wash off roofing materials, asphalt shingles especially. Over years, this gritty residue accumulates at low points or joints where the pipe slope isn’t consistent. If the original installation didn’t maintain at least a 1% grade (1 inch of drop per 8 feet), sediment settles and compounds the problem.
Root intrusion happens when tree roots sense moisture and work their way into joints or cracks in the pipe. This is more common with older clay tile or corrugated plastic pipe. Roots don’t have to break the pipe, they just need a hairline opening to infiltrate and expand.
Crushed or collapsed sections occur from soil settling, vehicle traffic over shallow burial depths, or freeze-thaw cycles in colder climates. A kinked corrugated pipe acts like a dam, catching everything upstream.
Signs Your Underground Drain System Needs Cleaning
Clogs don’t announce themselves until water has nowhere to go. Recognizing the warning signs early prevents foundation damage and erosion.
Water overflowing from downspouts during moderate rain is the most obvious indicator. If the gutters are clean but water still spills over the top near the downspout connection, the blockage is likely underground.
Pooling water around downspout bases signals a complete or near-complete obstruction. The water exits the downspout but can’t enter or move through the buried drain line.
Soggy patches or sunken areas in the yard along the drain path suggest the pipe is leaking or has collapsed. Water escaping through cracks saturates the soil above, killing grass and creating soft spots.
Gurgling sounds from downspouts during rain indicate air pockets trying to escape around a partial blockage. It’s the plumbing equivalent of a clogged sink drain.
Basement seepage or foundation cracks can develop when water isn’t diverted away from the house. If wet spots appear on basement walls after storms, the underground drain system may be failing to do its job. Addressing home drain cleaning early prevents more invasive repairs later.
Essential Tools and Materials for the Job
Cleaning underground drains doesn’t require a full plumbing truck, but having the right gear makes the difference between clearing a clog and worsening it.
Required tools:
- Garden hose with a high-pressure nozzle or pressure washer (1,500–2,000 PSI is plenty: don’t exceed 3,000 PSI on corrugated pipe)
- Drain snake or auger (25–50 feet, manual or powered)
- Shop vacuum (wet/dry capable, 5-gallon minimum)
- Plumber’s tape measure or fish tape for locating obstructions
- Adjustable wrench for removing cleanout caps
- Bucket and trowel for clearing debris at access points
Safety gear:
- Rubber gloves (contractor-grade, not disposable)
- Safety goggles (expect splashback)
- Knee pads if working at ground-level cleanouts
Optional but helpful:
- Inspection camera (affordable USB models work fine for spotting obstructions)
- Root-cutting attachment for drain snakes if trees are nearby
- Drain bladder (expands with water pressure to push clogs forward, effective but risky in fragile pipe)
Skip chemical drain cleaners. They don’t work well on underground systems and can damage older pipes or contaminate soil near the discharge point.
Step-by-Step Process to Clean Underground Gutter Drains
Locating Access Points and Drain Outlets
Start by mapping the system. Most underground drains have at least two access points: the downspout connection (where the vertical downspout meets the underground pipe) and the discharge outlet (where the pipe daylight or connects to a pop-up emitter, dry well, or storm sewer).
Finding the downspout connection: Remove the downspout extension or elbow at ground level. Some systems have a cleanout fitting, a capped vertical pipe a few inches tall that provides direct access to the horizontal drain line. Cleanouts are usually located within 3 feet of the downspout base. Use an adjustable wrench to loosen the cap counterclockwise.
Locating the outlet: Walk the suspected drain path (usually straight away from the house toward a lower grade). Look for pop-up emitters (small green or black plastic caps flush with the lawn that open under water pressure), daylight outlets on slopes, or connections to a storm drain inlet. In some cases, the pipe terminates at a dry well, a buried gravel-filled pit that disperses water into the soil.
If the outlet isn’t obvious, turn on a hose at the downspout connection and watch where water surfaces or listen for flow. Mark both ends before starting work.
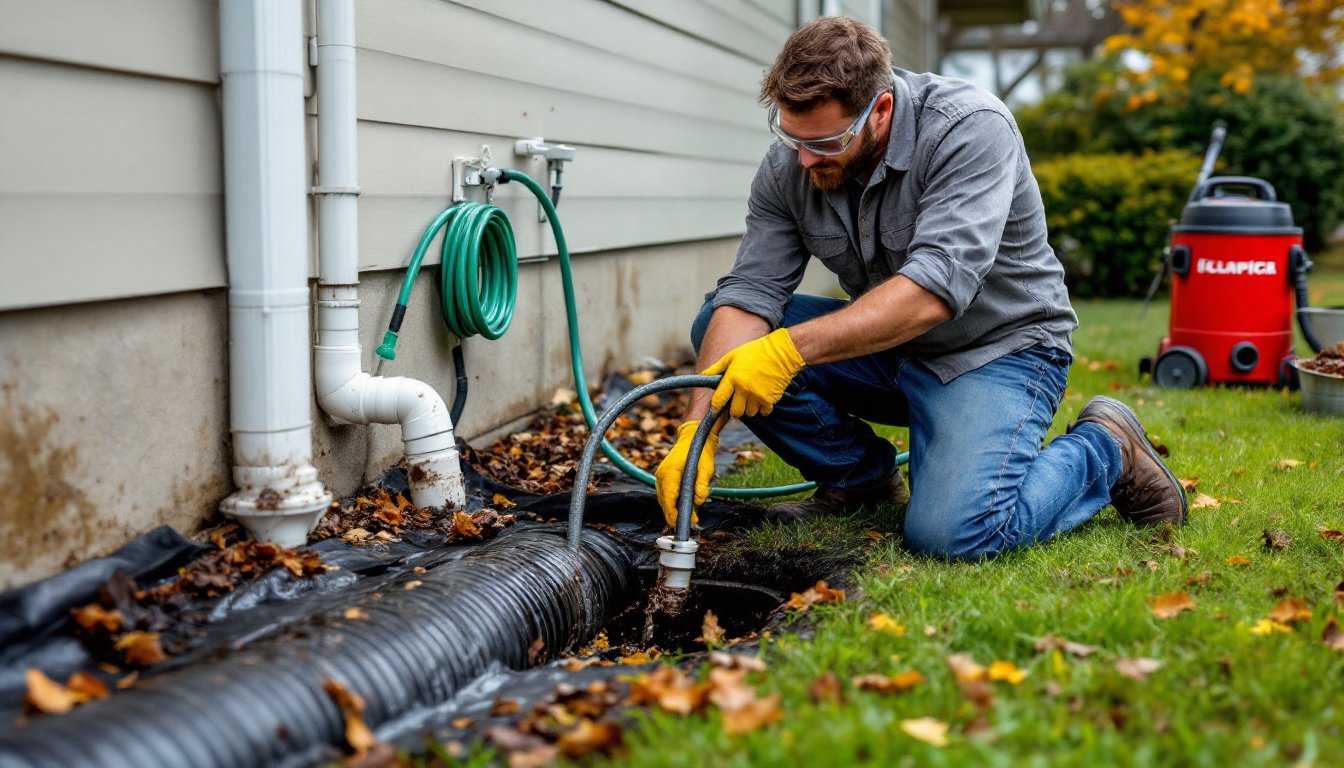
Flushing and Clearing the Blockage
Step 1: Clear surface debris. Remove leaves, mud, and sludge from the downspout connection and outlet by hand or with a trowel. Flush visible muck away from the opening.
Step 2: Flush from the top down. Insert a garden hose into the downspout connection or cleanout. Turn the water on full pressure and let it run for 5–10 minutes. If water flows freely out the discharge point, the clog may clear with flushing alone. If water backs up or pools, the blockage is stubborn.
Step 3: Snake the line. Feed a drain snake or auger into the access point, pushing forward with steady pressure. When resistance is felt, rotate the snake clockwise to break up or hook the obstruction. Corrugated pipe can snag the snake tip, work slowly to avoid lodging it. Pull the snake back periodically to remove captured debris.
Step 4: Reverse-flush from the outlet. If the clog persists, insert the hose at the discharge end and flush backward toward the downspout. This dislodges material stuck mid-pipe and pushes it back to the cleanout where it’s easier to extract. Have a bucket ready at the downspout connection to catch the backflow and debris.
Step 5: Use a wet/dry vacuum. For stubborn clogs near the access point, seal the vacuum hose against the cleanout or downspout opening and run it for 30–60 seconds. The suction often pulls loose debris that flushing can’t budge. Empty the vacuum canister frequently.
Step 6: Test the system. Run water from a hose at the downspout connection for several minutes while observing the outlet. Water should flow freely with no backup. If flow is sluggish, repeat the snaking and flushing process.
Maintaining clear downspouts is the first line of defense: techniques for cleaning gutters properly reduce debris entering the underground system. Some homeowners prefer professional gutter cleaning methods to prevent clogs before they reach buried pipes.
Preventing Future Clogs in Your Drainage System
Cleaning underground drains once is enough motivation to keep them clear. A few seasonal habits and small upgrades make a big difference.
Install downspout filters or strainers at the connection point. These inexpensive mesh baskets catch leaves and large debris before they enter the underground pipe. Clean them after every storm and seasonally.
Flush the system twice a year. Run a hose through the cleanout or downspout connection in spring and fall for 10–15 minutes. This prevents gradual sediment buildup and clears small obstructions before they solidify.
Trim trees and shrubs near drain paths. Roots follow moisture, and underground drains are an attractive target. Keep trees at least 10 feet from buried drain lines when possible. If roots are already a problem, consider lining the trench with root barrier fabric during a pipe replacement.
Ensure proper slope. If water consistently pools or drains slowly even after cleaning, the pipe may not have adequate grade. Underground drains should slope at least 1/8 inch per foot (1% grade). Correcting this requires excavation and resetting the pipe, not a simple DIY fix, but worth it for chronic issues.
Upgrade to solid PVC pipe. Corrugated pipe is cheap and flexible, making it popular for retrofit installations, but it snags debris and collapses under load. If replacing a failed section, use schedule 40 PVC (solid-wall, typically white or gray). It costs more upfront but lasts decades and resists clogs better. Smooth interior walls mean less friction and faster flow.
Add cleanout access points. If the system doesn’t have a cleanout, installing one near the downspout connection makes future maintenance far easier. A 4-inch PVC cleanout tee with a threaded cap costs under $15 and saves hours of frustration.
Inspect after major storms. Walk the property after heavy rain and check for overflow, pooling, or slow drainage. Catching a partial clog early prevents a full blockage later.
Following safe gutter maintenance practices keeps the entire system, from roofline to discharge, functioning as designed. A well-maintained underground drain system is invisible until it stops working. Keep it that way with routine attention, and the foundation, basement, and landscaping stay dry year-round.